Wednesday, March 28, 2012

pinatas complete


so i finished six pinatas.  i ended up using a lot of double sided tape.  i ran out after 2 rolls.  one was just a scotch one and the other was one of those fancy roller looking things.  the last pinata i just used masking tape.  i hope the stuff doesnt all fall off.  for the shapes i went to the confetti system website and just took some ideas.  i used just metallic paper in gold, silver and copper.  if you look at the first one on their site, i kind of messed up and made it three sided instead of four.    also the one with pentagons was difficult just because i couldnt figure out how to draw a pentagon without a compass but i think you actually only need a circle and a ruler.  you dont really need a compass.
all in all im pretty happy about the pinatas.  i wasnt as happy with the tassle garland because i felt like it didnt look as professional as confetti systems.  but hey im just a playgiarist.  i also noticed that their tassles and pinatas all have very straight precise and accurate cuts  wheres mine as more random and lots of cuts that were not straight.  i kept on wondering how they cut theirs. 

Monday, March 19, 2012

pinatas

so ive been putting off this project for a while because 1.  i couldnt collect any cardboard and 2.  i was afraid of storing these pinatas because of size and lack of space.  but last week i got several packages and so i got my cardboard!  i have one finished so far but am planning to make other shapes and colors (gold and silver)  im loving the copper though.

i basically cut 6 of the same triangles and then tape them together with masking tape.  then i started at the bottom and started taping strips of the metallic paper on.  then i would cut them.  i think taping them on then cutting them probably make the process a bit less speedy than cutting the fringes then taping the piece on.  also i made the mistake of lining the whole strip with double sided tape instead of just a bit here and there.  at some of the corners you can see the masking tape and cardboard so i decided to wrap the end pieces around a bit to cover them.

ribbon wands completed

so i finally added the finishing touch to my ribbon wands.  i had wanted to add some sort of instruction like "after c&s get pronounce husband and wife, wave these around"  or something.  but i didnt like that it would be a bit verbose.  i also didnt know where i could attached a tag of any sort.  so i just took the letter stamps and stamped "yay", "hooray", "rah rah", "hip hip", or "cheers" on the tops of the rods and also "c&s"


Tuesday, March 13, 2012

neon pumps

this isnt wedding decor related but it was a fun and easy DIY.  ive been on a sort of neon craze.  not that ive been dressing head to toe in neon but neon accents really catch my eye.  i did see some neon accented shoes that were cute but not exactly what i wanted so i took matters into my own hands!  i bought some cheapie pumps at target. then taped them with masking tape and spray painted the bottoms neon pink.  the only thing is i shouldve primed the bottom first because it was originally a beige color.  if i had primed it, i think the neon wouldve been much brighter.  oh well.

Monday, February 27, 2012

table numbers

i saw these table numbers in a blog post and thought they were awesome!!  we decided to tackle the project but havent quite completed it.  we bought posts from home depot.  about two 8 ft posts.  stephen's dad has a saw in fremont that he used to cut them into 1 foot pieces and also power sanded them

i then went ahead and stained them but of course i didnt read the directions on the stain before proceeding.  the stain came out a bit more than a stain and more like a paint.  stephen plans on sanding them down again and then putting the nails in.  i actually tried to hamme the nails in but they came out crooked and terrible.  so im leaving the job to him.

i actually tried to hand sand it but stain is really tough to sand.  its thick and not meant to fade with a little wear.  i freehanded the numbers but ive seen some DIYs where they nail on a printout or create a carbon copy etc

fringe streamers

so i originally didnt plan on tackling this one but thought it might be an easy project. i think i underestimated it a bit.  i saw a repost of this tutorial and bought some folds from this store.  the only issue with this store is that they charge a lot for shipping which really jacks up the price.  also i ordered the folds without really thinking about how all the colors would work.  it ended up looking too easter-y or pastel-y so i had to order more and i had to pay the shipping again!  argh

also cutting the fringes was pretty difficult for me in that i kept blistering my hands.  i ended up bandaging up my fingers so i could keep working but then other parts of my fingers would blister.  maybe i dont have the right, comfortable scissors?  not sure but some battle scars on this one.

so i cut the folds into 2 and 3 inch widths and then fringed them all.  i havent put it together yet and will probably do so closer to the date.  i am thinking of using rope instead of dowels to hang these but not sure how that would hold up. i know the rope would be easier to transport for me.  picture later when its finished.

Monday, February 13, 2012

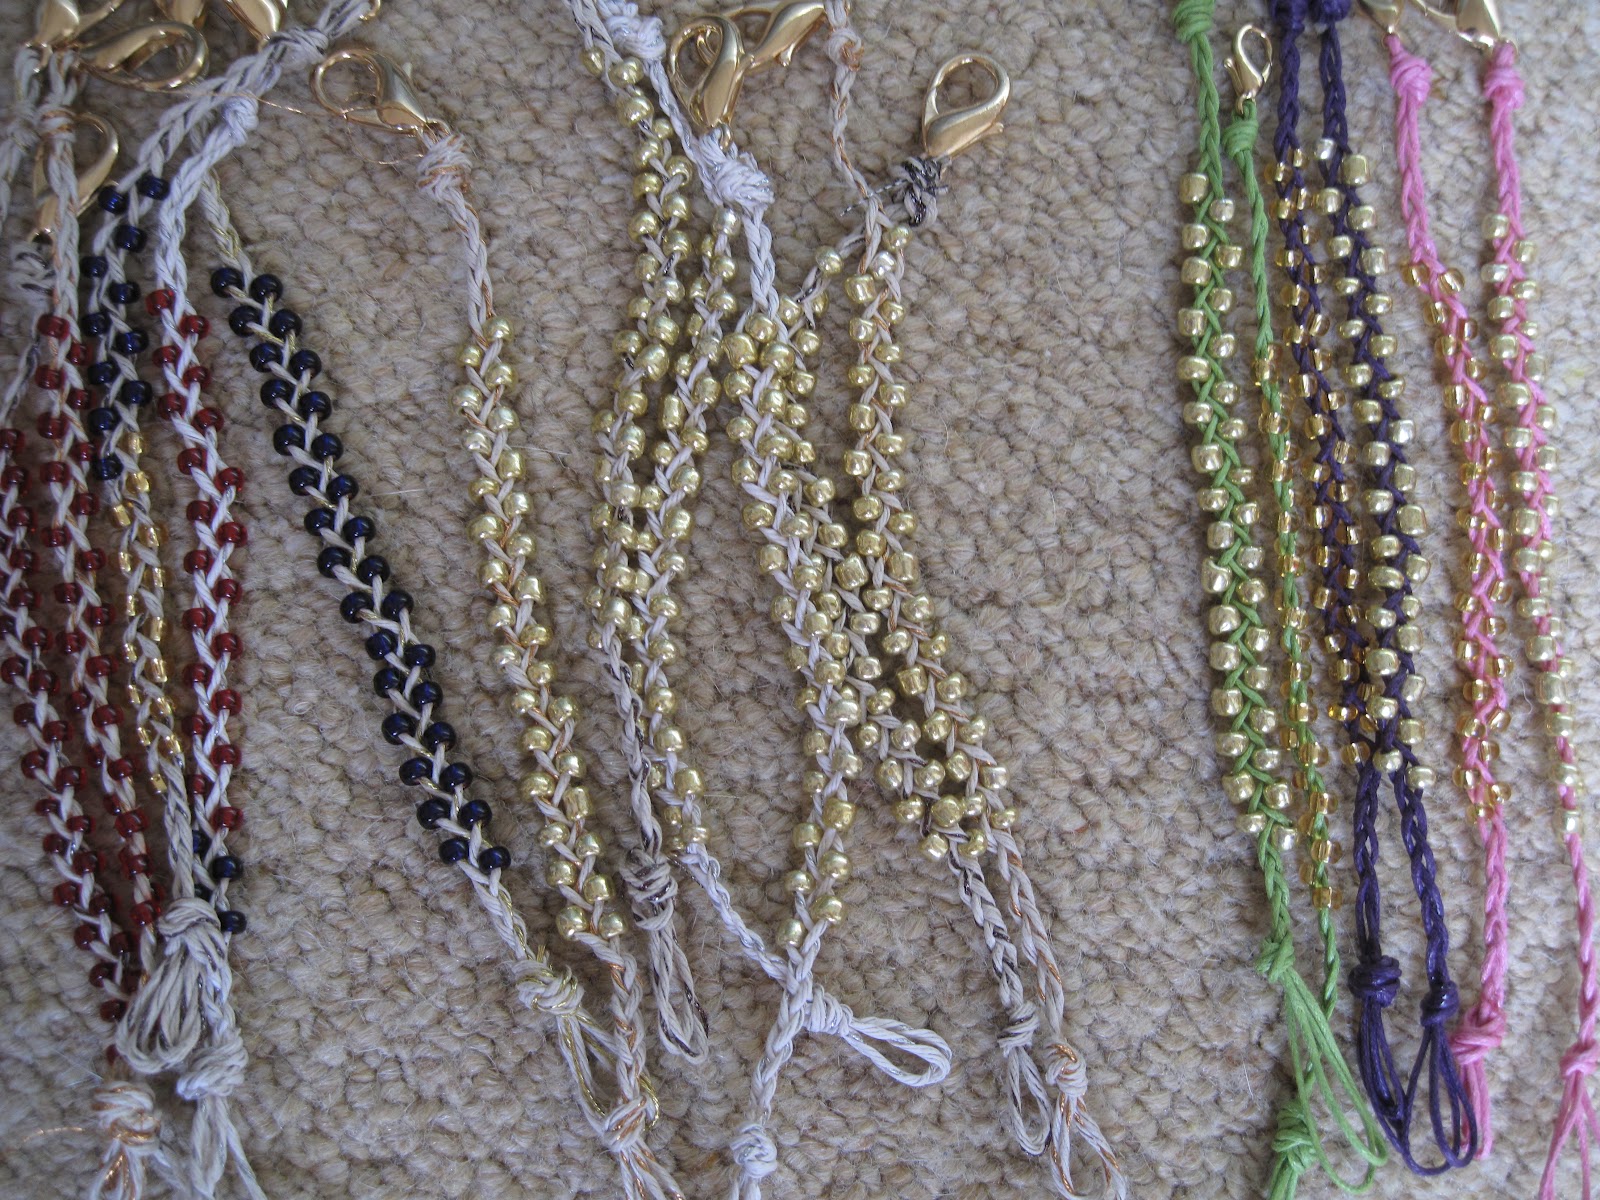
bracelet favors


so honestlywtf.com has some really cool diy bracelets that ive always wanted to try.  for my bachelorette i wanted to give everyone favors so i decided to make bracelets. i made the braided bead, braided hex and also the wrap.  both really easy.   hopefully people can stack these etc.

different from the diy i added a clasp to all of these.  i found it easier to add the clasp first rather than at the end.  the end is a loop and a knot.  i also used a bit of glue to seal off the loose ends just in case.